Showing posts with label printing. Show all posts

Thursday, March 29, 2018

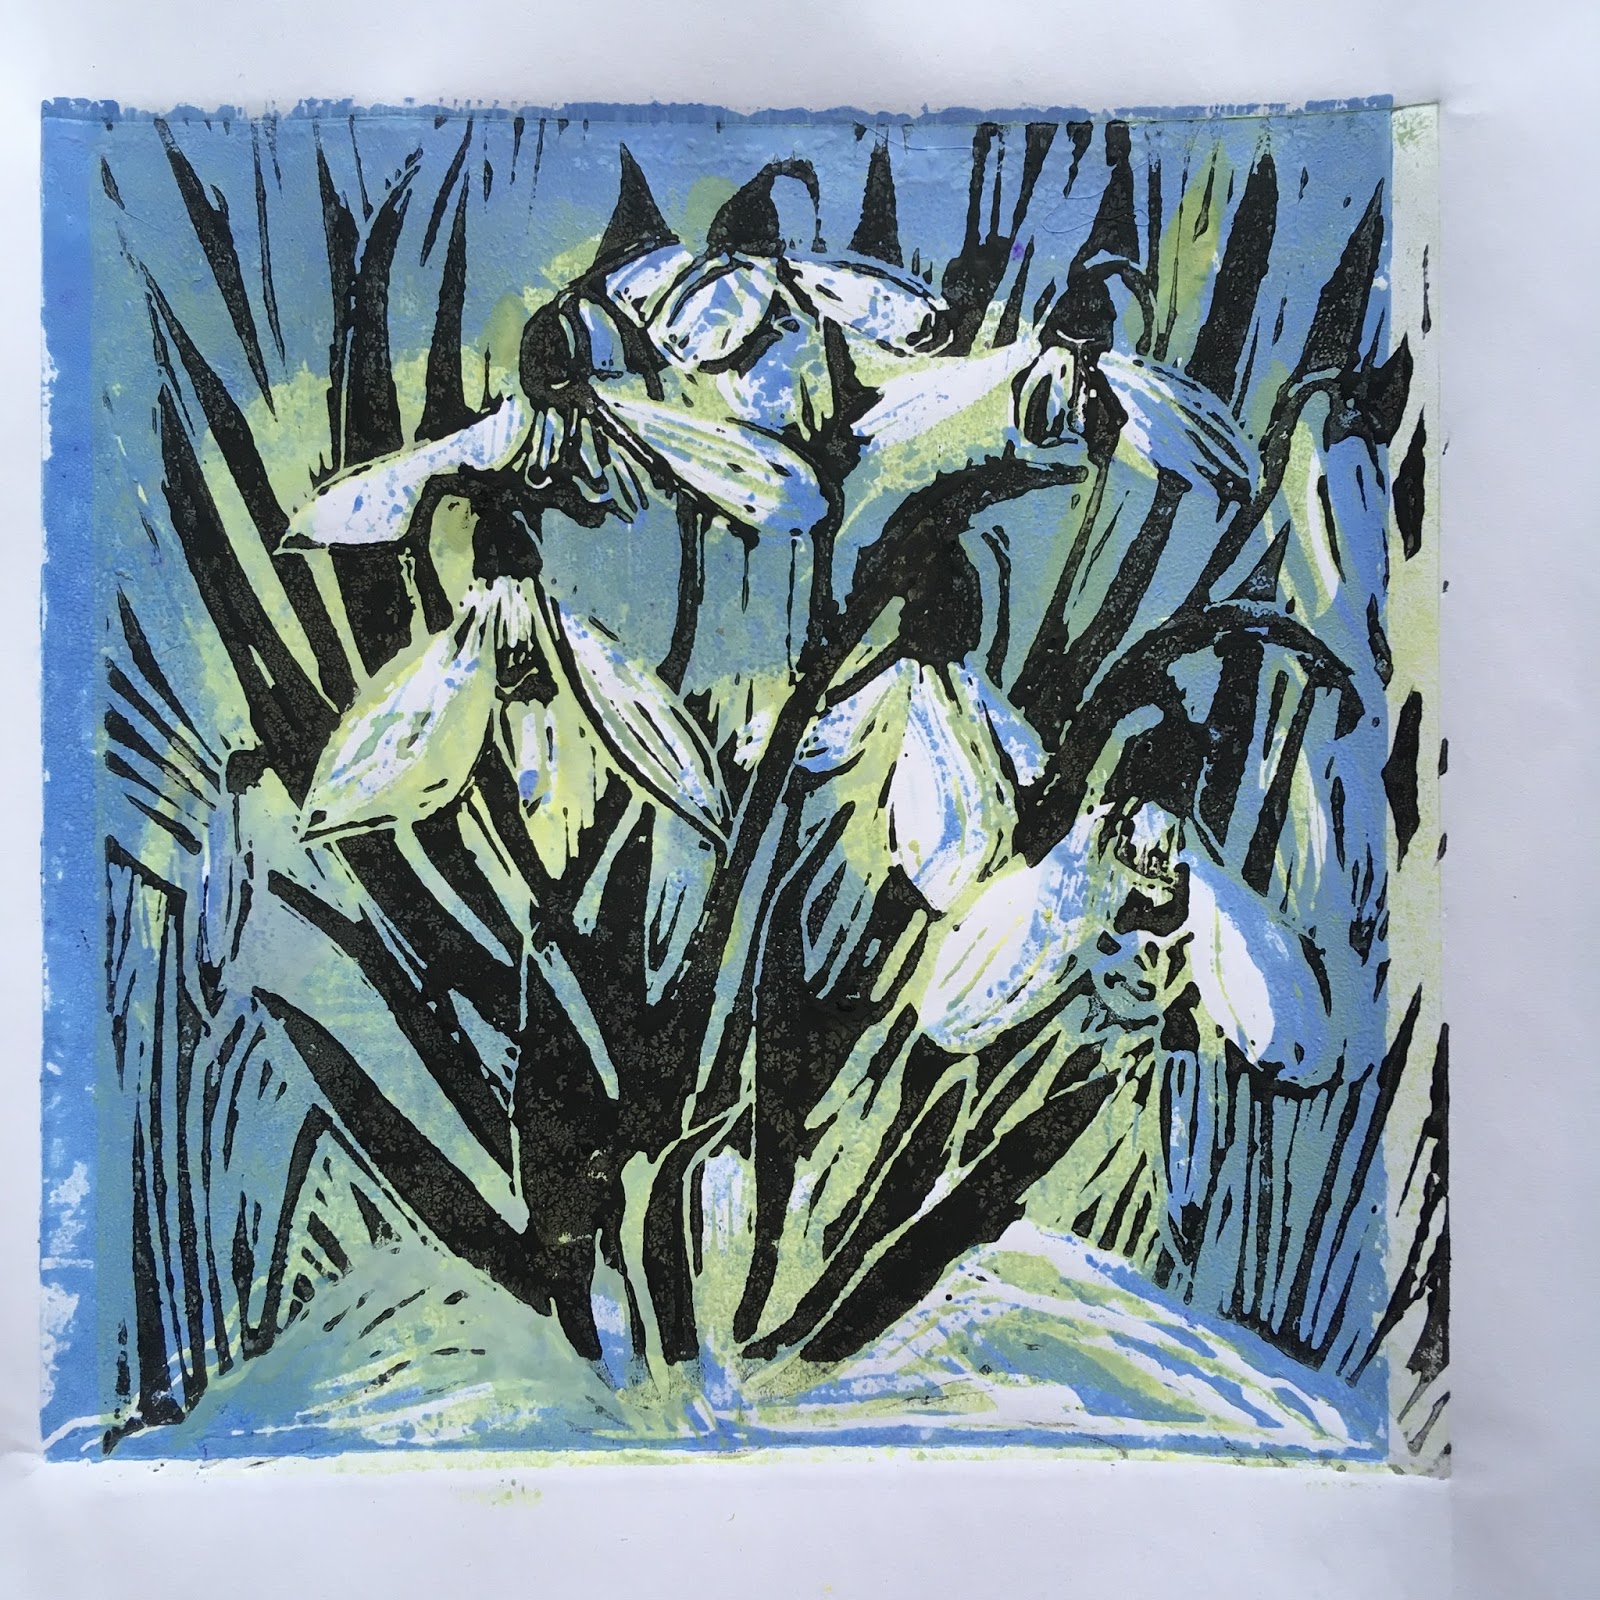
Spring Snowdrops - Lino Print (using Brusho)

Black on Colour
2nd Cut


Snowdrops - Lino prints
I am an experimentalist (not even sure that's a real word - but I like it). 

I like to play and push theories as far as they can take me and maybe further. 


So as a newbie with Lino here is what I recently did.....

Once I discovered the joys of printing, first via a Gel Plate and then doing collagraph work I was hooked (see previous entries) and desperate for some kind of "affordable" printing press.  So I started my search.

Valentines day last year my search ended at Ebay and found this baby for £15.00.  I still wasn't sure if it would work, but I was determined to try.


In this project I am Lino printing using my mangle as a printing press. 

 I have prepared it by rolling in a large MDF drawing board and made a registration jig using two corners of an A4 mount which has carefully been measured around the lino block aperture.

  Here you can see that that aperture is larger than the block I will be using as I have squared it off.  This did not really cause me any problems as I fitted it each time to the top left corner.  Double sided tape can be used to keep the block in place

The mangle set up with the registration board
I taped down the jig and set my rollers to the pressure that I need for lino printing.  This would be set tighter if I were to collagraph (or intaglio) print.

I have two A4 board pieces taken from the back of old sketch pads and a large chammois style cloth folded in half.

I later replaced one of the A4 pieces for a much larger piece to cover the whole area.

I rolled out a few practice runs till I was happy with the pressure.  This is important so that you do not ruin any potential prints.

Another theory I wanted to test was the use of Brusho powder in tinting block printing ink for printing from Lino.  I have searched everywhere for reference to this and found nothing.  So I thought I would see if it works.  The same goes for the Brusho thickener......I needed to find another use for it.  So I played.......


I printed all the backgrounds using these colours

My materials for this project

Ist cut - leaving the white
My Lino block
Black and White Block printing ink (waterbased)
Brusho in Blue and Yellow
Acrylic Paints
Brusho thickener to help with consistency
Brayers or rollers
Tile to roll out colour 
Different papers and card.

I began by planning my design and then cutting out the areas I wanted to keep white.

I then wanted to print some pretty backgrounds using light blues and greens.  This is achieved by putting down some of the white block printing ink on a plate and sprinkling in some Ost Blue Brusho powder and added some of the Brusho thickener that was now in gel form. As the white ink was waterbased this was possible. DO NOT TRY WITH OIL BASED INK.

I worked the mix till I got the right colours and consistency.

Here are examples of how they turned out.  The thinner the mix the more Iiked it.

I love the gentle texture the Brusho gives on these prints.  


2nd cut
Ink loosened with Brusho
I did my 2nd cut on my block. 

 This area will show the how much of the background I want and the first printing of stems and leaves.

  The ink is very very thick so I added some Brusho gel to loosen (not water)
  I worked the ink till it was tacky and sounded like velcro.

 I decided to do a black run first.

Just Black on White
Black on colour


These turned out to be very effective.

I like both looks.


I then rolled out a brighter green first with brusho
and later with acrylic paints 
(which I have found to work very well) 
and did my 2nd cut green print over the backgrounds


Different looks are achieved by using different greens and different rollers too.

The softer the roller the denser the print.  I made my own soft roller using a childs sponge roller and replace the sponge with a cork covered in foam sheet stuck with a glue gun....

Worked perfectly......


I also printed the green over previously pre printed monoprints for a very different subtle look


The last stage was doing the 3rd cut which will show some of the lighter green as highlights etc with a darker edge. 

This time I used a combination of blue and green acrylics.


A final print on textured paper
I like using acrylics for various reasons, but one is that it's permanent and therefore if I want to embellish these later the colour won't run. I could use oil based inks but I don't have those and they take longer to dry.


I am still very new to this method and many of the prints were not perfect for various reasons.  But I have learnt so much during the process which will enable me to achieve a better quality batch next time.

Although the block I am left with doesn’t have much left on it it still has enough to give an impression of a group of snowdrops and I can play more with this idea later.


Watch this space.

VIDEO I have made a video showing the processes and the results.  Click on the link here

Thank you for joining me here and if you have any comments please do not hesitate to ask in the comments below.

See you soon

Bix x

NB: Brusho products from Colourcraft Ltd , Blocking printing ink from Seawhites of Brighton

Friday, February 17, 2017

Hip Op and moving forward


Bandouille Lake 2017


Moving forward…and yes at a rate now too.

Its February already and I did have so many plans to write this sooner.  But old habits die hard.

The weather has been extraordinary.

I'm typing this after a day reaching 18 degrees???? But we have had lovely frosty days too.  But nothing like the snow and Ice that we used to get.

After my second hip op in November I am back on track and have been in the garden trying to catch up with raking up the leaves and generally tidying up.  Great (hopefully) for building up the muscle again.  I have also been in the Studio (and kitchen) doing lots of Gel Press Prints.  I had a fabulous run on those and got some great results too.

I have a Gel Plate workshop planned beginning of March and the ideas are racing! 

These three rectangular images were created using the largest  plate by Gel Press.  12 x 14 inch


Summer Days
Heron Haven - Bandouille


And then……I officially discovered "real" Collagraph printing.

I entered a challenge in January for fun - as I do - and the photo did not inspire me to paint it.  So I thought I would make a collagraph plate and see how that panned out.  Oh boy did I have fun.  I combined the technique with Gel printing and watercolour and this was my final entry to which a gained 4th place.  Seriously...I was thrilled!  Well who else is going to blow my trumpet? 


Of course I have made collagraphs before and used them in my Gel prints.

But when a few wonderful artists work popped up in my Pinterest feed I have been hooked ever since, wanting to know everything there is to know about collagaphing. I then realised how little I knew of this absorbing art  form.

So I have been researching and playing….of course!


In the meantime checkout Sarah Ross Thompson, Sue Brown and Hester Stolly Cox to name but a few.  Checkout Collagraph on Pinterest too and see what wonders you will get.

The beauty for me at the moment is that it is another tool from which to produce something unique.  

These artists above have spent a long time honing their craft and I do not wish to imagine that I can do what they do because I am not that far down that road - yet.  


With Pasta Maker
But I am using Collagraph techniques to create within my realms of knowledge in watercolour, collage, gel printing etc and enjoying the experimenting. I have also realised that this is a great way for any artist in any medium to get to know their subject.  As they have to create what they want to do in such intimate detail to create a plate.  By the time they have pulled a few prints every line, every edge is known to the artist.

I have just experimented with a Pasta Maker and also bought an old mangle with intent on converting it to a press.  We shall see! In the meantime I am using my body and my hands to press into the plates.  Fun!

If you  want to know more and get fantastic support and guidance join the Collagraph Worldwide FB group.  I have learnt so much from them and am truly inspired


Any of the above techniques can be learned at one of our standard holidays. 

We also have tutored holidays. 

Please enquire.  Our 2017 Art Holidays at Bandouille calendar is now open.

Please visit www.francepaintingholiday.com for all the details.

More coming up very soon.

Bix xx

Sunday, March 13, 2016

Fresh Air?

Spent nearly the whole of last week pretty much locked  in my very "underused in the winter" Studio as I took delivery of 14 different sized Gel Press Plates from Gel Press in the US on Tuesday. So not alot of fresh was had!!! A shock as I only had to wait 3 days and was thrilled when the box arrived jammed packed with goodies.

As part of my  role as a Creative Designer for the Team I need to play with each Gel Press Plate and see what I can come up with and my head is swimming with ideas.

So Tuesday was spent prepping the area in the Studio for my marathon session including lighting the stove on Wednesday and Thursday as it was pretty cold out there and the room takes a good while to warm up.

Somebody else wanted to join me in the warm studio, but at this point, covered in cobwebs, didnt gain entry. But managed to later and left a paw print or two.

I decided that I wanted to work on the 10x8 Gel Press plate as that was a bit larger than what I am used to.  Effectively it is just a wee bit smaller than an A4 sheet of paper as you can see from the image below.

For warming up I just added a few blobs of acrylic paint on the plate and smoothed them out with the brayer and textured the surface with some home made stamps and bubble wrap took a first pull and then added the dragonfly masks and some blue green paint rollered over the top
 
I next planned some landscapes that I had been storing in my "to do" file. And these were the outcome after embellishment

I like instant results so this method suits me well.  One of my favourites is below!


***TOPTIP***
My advice is go for a subject that you love...if you try to create something you do not like it will show in the finished work.

My Bonnie lies over the ocean
I shall be doing a landscape video very soon, so follow me here on this blog and on Gel Press Junkies for the latest updates from me and my Gel Press Creative Team mates..

I hope to launch my website this week so that you can see some Gel Press prints that were created in this session under Recent Work and my other work.


Please feel free to ask questions and leave a comment

Thats it for now

Bix x


Thursday, February 25, 2016

Bixxy Nash - Creative Designer

Today I can officially announce that I am to be part of a team for an American based company called Gel Press as a Creative Designer amongst others with the same role. The great thing is that we all use similar tools but we produce very different work.  So this really is art that YOU create and will always be unique.

Its all exciting! 


So my Gel plate printing in the last couple of years has paid off and I hope now to move forward with the craft and develop many more techniques and already my head is swimming with inspiration and ideas. 

This is the facebook page for Gel Press Junkies so pop over there every so often to see what has been created by the team and other members. 


Recent work


So join me on my journey and please feel free to comment at anytime and I will endeavour to answer your questions.

These past few weeks has seen me busy with a miriad of things including the building of a new website and updating some old footage of videos etc.

Qatar
I also joined a group on Facebook called Everyday in February which is a sketching group.  


Peru
A new years resolution of "i must do more sketching in more creative ways" has resulted in my getting the above job on the team, by giving me the confidence to "go for it".  

This has been great for me as I also used gel printed papers that were in my "what do i do with these" box and sketched over them.  The theme this month was world travel and we given a different country per day to visit.  Here are some of mine on the Printed papers.
I selected each sheet based on the coloring of the scene that I had in mind or maybe just the national colours of the country from their flag.  I then worked round that. 
Sweden

  I used Micron tip pens to do the drawing and Tombow pens (brush felt tip style pens) for alot of the bright bits and watercolour in the lighter areas where the paint could take.


Oman
Of course you really could go mad and do collage and decoupage ontop using stamps of the countries and other souvenirs and memorabilia.


This is definately something I will be doing for my travel journals and will update you on these when I start.

So will all this going on....the holiday bookings are still coming in and I am looking forward to this season.

If anyone is interested in a Gel Press workshop please mail me on info@francepaintingholiday and I can give you some more information

I will end it here and be back in a few days with more.....

Abientot
Bix x


Monday, February 3, 2014

I'm in Love!!!!!

In love with a process called Gelli Plate printing.

Not heard of it?  Just type it in Google and oooooooogle it!   For me being a lover of finding ways to texture in watercolour, this is very different as using mostly acrylics which are textured in themselves, but am also experimenting with inks (brusho) and watercolour too and have a zillion ideas in my head.

But first I needed Gelli Plate, whose main ingredient, as the name indicates is humble Gelatine.  But don't be fooled to think its that easy.  i found that Gelatine comes in different forms, those being powder and sheets to name the only two that I have found.  And I am guessing that the content of these will vary depending on where you live.  So there is some degree of experimenting to do here.  But once made the plate will last and even when damaged or stained, you can melt it down again (on the stove or in the Microwave) and reset in a mould.

There are quite a few recipes on the web, and this is one that I used and modified it a bit to suit me, as my plate seemed weaker than the one shown and described. screen.

Gelli Plate Recipe

 There are recipes too that include Alcohol but that seems to be retracted as there were problems with the setting.  My recipe set down here can set without refrigeration, and kept without refrigeration too but if you have room in your fridge and your family wont tuck into it, it tends to speed setting up.  Try and leave it alone for a minimum of 24 hours.  I didnt and it was'nt ready and I had to reset it again.  One day I'll learn!
My first Gelli Plate
  
     Glycerine     -   250ml (From chemists)
     Gelatine       -     35gm = 2 packs dry sheets Gelatine
     Sugar           -    70gm
     Water           -   120ml
     Vinegar       -    120ml (white)
     Salt             -    1 tablespoon

Method: Soak the gelatine leaves in water for 5 mins till soft. Strain and put in saucepan add 120 ml boiling water and add sugar, vinegar and salt.  Heat through but do not boil  Add glycerine.  Stir till dissolved and pour in a suitable dish.  This could be a square glass Pyrex style dish, or a plastic container.  As long as it has straight sides and is over 1/2 inch deep. But it can be whatever size and shape you wish your prints to be and when you are bored you can melt it down and start again.  I made two from the recipe.  One square and one oblong!


This is the first time that I have done anything like this so am feeling my way and the Internet is a fantastic resource for millions of ideas, but experimenting is the key.  So try things out and see what works and what doesn't. But the one thing I did have was plenty of acrylic paint.  So I just played.  I also got out some rubbish watercolour tubes I had and didn't know what to do with and they are perfect for this.Even the Brusho has come out to be tested.. 


Now its play time. I recommend that you watch a few videos on Youtube Click link to see one artists work.  This video is nearly 2 hours long and there is plenty in it. See how others do theirs and then find your own way. Acrylic paints in tubes are ones that I am using as those are the ones that I have at hand, but more liquid ones in bottles can to be used too and I suspect that they will work better. 

Place small amounts on the plate, of colours that you like and then using a roller, brush, scraper, piece of card or even a pallete knife spread the paint around and then press different texture things into the paint to leave an impression.  Bubble wrap, corks, keys, buttons, string the options are endless.  Once your brain starts working on these texture ideas, it wont stop and now I am making my own stencils, masques, and stamps from polystyrene felt, foam and anything I can get my hands on.

The first pull many say (and I agree) is not everyones favourite as there is usually too much paint on the print, and by doing a second pull you are left with "ghosting" marks of the stencil or masque that you may have used. See left .  This produces a far more satisfying print in my opinion and one that you can grow from!

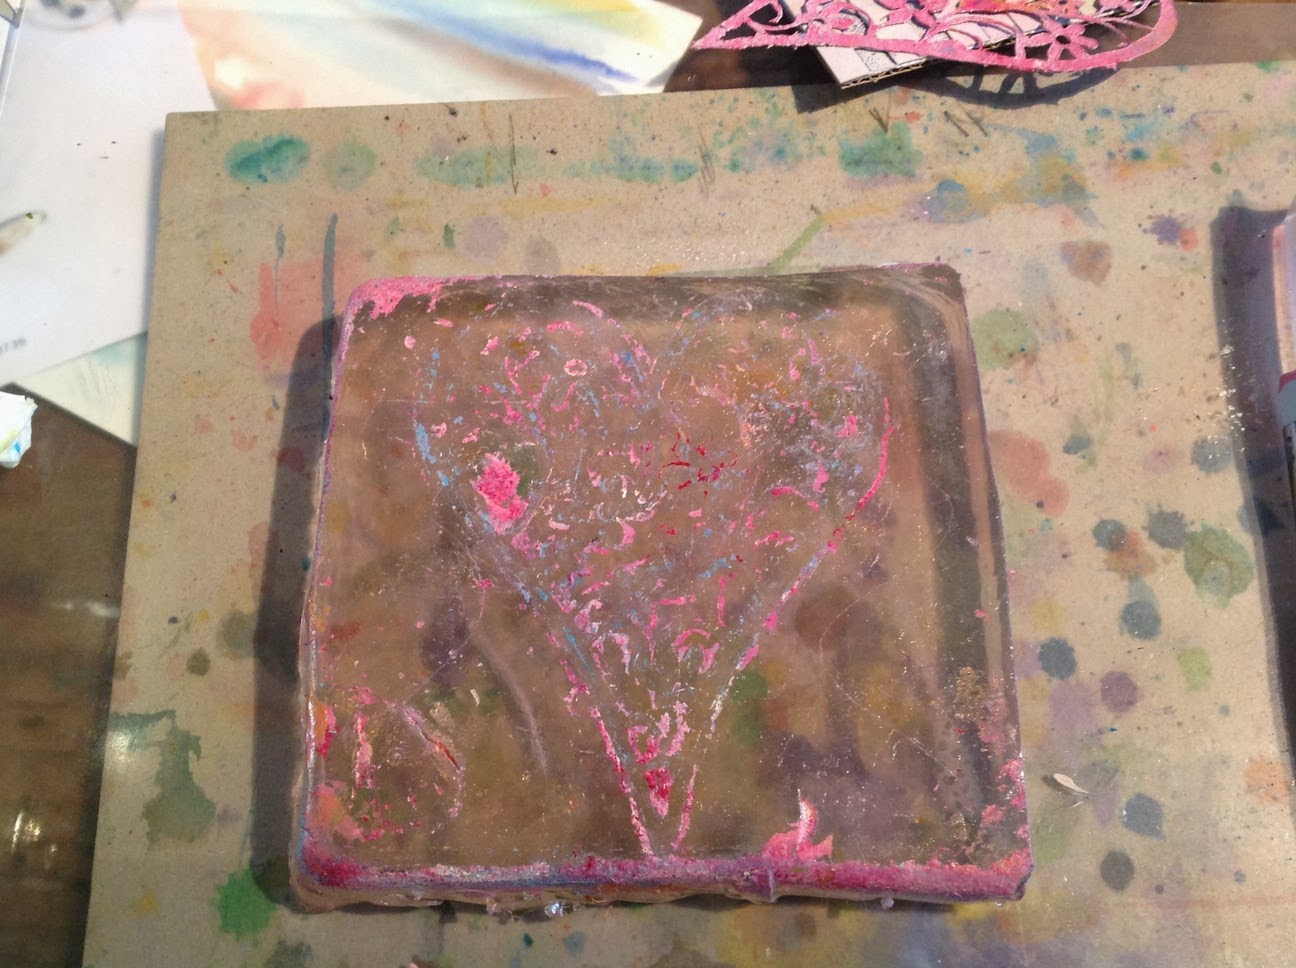
This heart was created by cutting a stencil from thin acetate with a soldering iron.  Worked great!  It melts polystyrene beautifully too.

These are some of my first pulls and this is what I have turned them into! 


After I have sat down with them for a while, I then decide on how I want to take them further and embellish with my Tombo and Zig pens, and silver and gold pens too.  A decoupage here and there et voila!!!! Another creation.


Your imagination is what gets this project going and what you can see in what you created and how far you want it to go!


The result of painting quite thick on the plate but that gave me four pulls and I was able to go in later and enhance with tombow pens and pull out the details that I wanted.


This is something I doodled with last night and where I want it to go  I printed off on the photocopier first to test my theory.  Now just have to be brave enough to try it out for real!

Now where do think I will be going with this one?

If you want to see more results of my gelli plate printing, please visit my Pinterest page by clicking here where I will be post more of my art, hopefully as I do it!

Also think of holding craft week holidays here at Bandouille so if you are interested please let me know and I will earmark a week this year!


Feel free to ask questions or comments and have fun!

Bix x


PS  to people that have followed my Bandouille blog in the past!!! Be impressed! My second post in 3 weeks....hey hey!!! x