Showing posts with label acrylic. Show all posts

Thursday, March 29, 2018

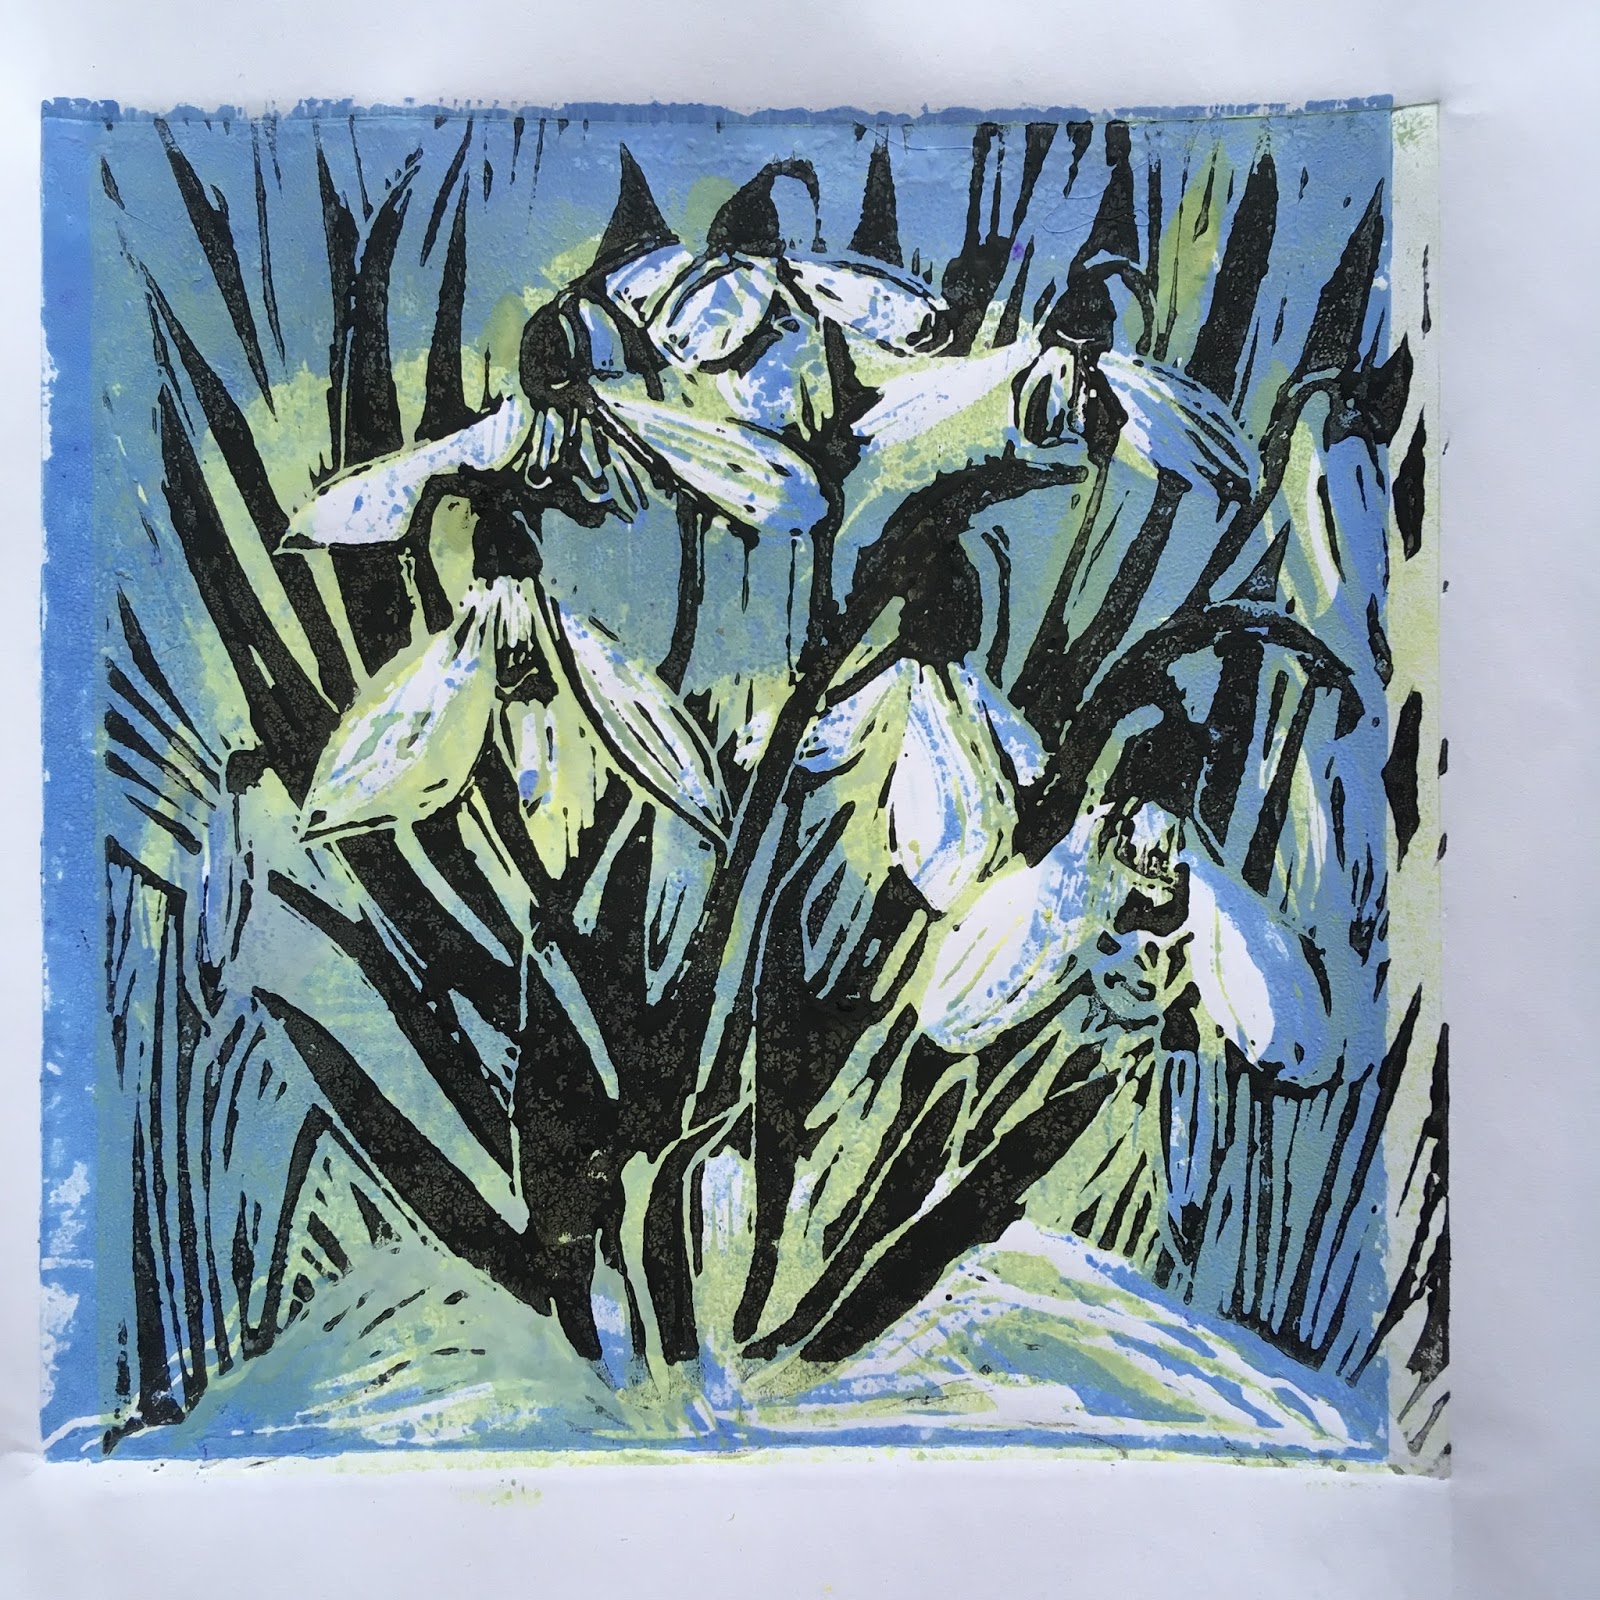
Spring Snowdrops - Lino Print (using Brusho)

Black on Colour
2nd Cut


Snowdrops - Lino prints
I am an experimentalist (not even sure that's a real word - but I like it). 

I like to play and push theories as far as they can take me and maybe further. 


So as a newbie with Lino here is what I recently did.....

Once I discovered the joys of printing, first via a Gel Plate and then doing collagraph work I was hooked (see previous entries) and desperate for some kind of "affordable" printing press.  So I started my search.

Valentines day last year my search ended at Ebay and found this baby for £15.00.  I still wasn't sure if it would work, but I was determined to try.


In this project I am Lino printing using my mangle as a printing press. 

 I have prepared it by rolling in a large MDF drawing board and made a registration jig using two corners of an A4 mount which has carefully been measured around the lino block aperture.

  Here you can see that that aperture is larger than the block I will be using as I have squared it off.  This did not really cause me any problems as I fitted it each time to the top left corner.  Double sided tape can be used to keep the block in place

The mangle set up with the registration board
I taped down the jig and set my rollers to the pressure that I need for lino printing.  This would be set tighter if I were to collagraph (or intaglio) print.

I have two A4 board pieces taken from the back of old sketch pads and a large chammois style cloth folded in half.

I later replaced one of the A4 pieces for a much larger piece to cover the whole area.

I rolled out a few practice runs till I was happy with the pressure.  This is important so that you do not ruin any potential prints.

Another theory I wanted to test was the use of Brusho powder in tinting block printing ink for printing from Lino.  I have searched everywhere for reference to this and found nothing.  So I thought I would see if it works.  The same goes for the Brusho thickener......I needed to find another use for it.  So I played.......


I printed all the backgrounds using these colours

My materials for this project

Ist cut - leaving the white
My Lino block
Black and White Block printing ink (waterbased)
Brusho in Blue and Yellow
Acrylic Paints
Brusho thickener to help with consistency
Brayers or rollers
Tile to roll out colour 
Different papers and card.

I began by planning my design and then cutting out the areas I wanted to keep white.

I then wanted to print some pretty backgrounds using light blues and greens.  This is achieved by putting down some of the white block printing ink on a plate and sprinkling in some Ost Blue Brusho powder and added some of the Brusho thickener that was now in gel form. As the white ink was waterbased this was possible. DO NOT TRY WITH OIL BASED INK.

I worked the mix till I got the right colours and consistency.

Here are examples of how they turned out.  The thinner the mix the more Iiked it.

I love the gentle texture the Brusho gives on these prints.  


2nd cut
Ink loosened with Brusho
I did my 2nd cut on my block. 

 This area will show the how much of the background I want and the first printing of stems and leaves.

  The ink is very very thick so I added some Brusho gel to loosen (not water)
  I worked the ink till it was tacky and sounded like velcro.

 I decided to do a black run first.

Just Black on White
Black on colour


These turned out to be very effective.

I like both looks.


I then rolled out a brighter green first with brusho
and later with acrylic paints 
(which I have found to work very well) 
and did my 2nd cut green print over the backgrounds


Different looks are achieved by using different greens and different rollers too.

The softer the roller the denser the print.  I made my own soft roller using a childs sponge roller and replace the sponge with a cork covered in foam sheet stuck with a glue gun....

Worked perfectly......


I also printed the green over previously pre printed monoprints for a very different subtle look


The last stage was doing the 3rd cut which will show some of the lighter green as highlights etc with a darker edge. 

This time I used a combination of blue and green acrylics.


A final print on textured paper
I like using acrylics for various reasons, but one is that it's permanent and therefore if I want to embellish these later the colour won't run. I could use oil based inks but I don't have those and they take longer to dry.


I am still very new to this method and many of the prints were not perfect for various reasons.  But I have learnt so much during the process which will enable me to achieve a better quality batch next time.

Although the block I am left with doesn’t have much left on it it still has enough to give an impression of a group of snowdrops and I can play more with this idea later.


Watch this space.

VIDEO I have made a video showing the processes and the results.  Click on the link here

Thank you for joining me here and if you have any comments please do not hesitate to ask in the comments below.

See you soon

Bix x

NB: Brusho products from Colourcraft Ltd , Blocking printing ink from Seawhites of Brighton

Wednesday, April 20, 2016

World Earth Day with Gel Press

Welcome to the Gel Press Earth Day Blog Hop!

We want to encourage you to reuse and recycle with Gel Press.  Have you thought of making Gel Press Prints on old maps?  What about old Christmas cards or even magazines? 

Hop around and see what our designers have come up with for this hop.  We will be giving away a prize again for the comments on the Gel Press Blog listing what your favorite project was and why. 

Enter by going to all of the blogs listed and linked below.  Leave a comment on the Gel Press Blog telling us your favourite project. 

We will accept comments from April 20th - April 24th.    

The winner will be announced April 25th  on Gel Press Junkies FB page !  Good Luck!


****Please note that the prize is only valid for US residents at this stage***  Sorry!  But this doesn't stop everyone else joining in and commenting


Here is a Step by Step to show what I did to achieve this look and more!

Materials
8 inch Round Gel Press Plate                                                  SLIDESHOW BELOW
Acrylic Paints
Torn Paper
Stencil
Images for decoupage
Assorted pens for embellishing

***Top Tip***  
If you don't know where you are going with a project,  I like to do good quality photocopies of the base print that I like and keep some spares so that I can try different effects on each of them. Its also useful to have so you can create different things for different occasions. Each will still be unique.  This is also useful if something you are trying fails.   You will always have another at hand to do it again.


First select the plate you wish to use


I then printed off a design for under the first layer of paint (have more ready, just in case!!!!!)

I then spread the paint with the brayer making sure that this coat was thin and transparent

Next I lined up my prepared sheet of paper and made my pull. Wipe any areas of paint to expose more of the layer underneath 


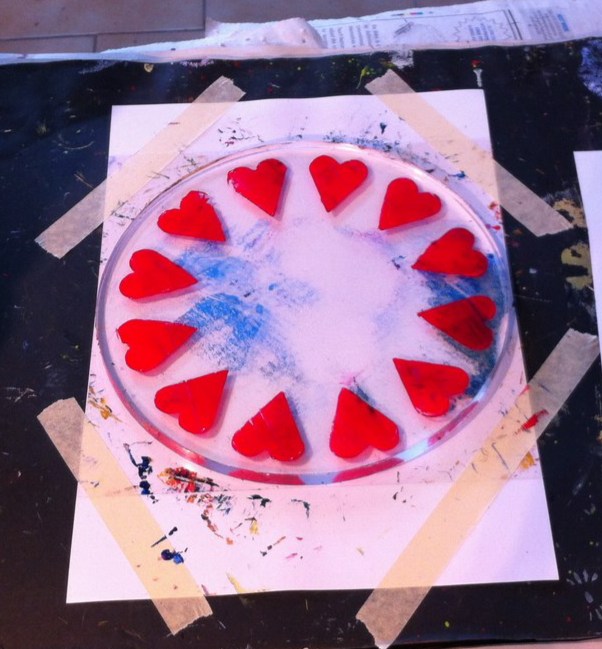
I then add the stencil hearts all around the circle.  I prefer this method on the plate as the pull wont be so dense and it will have more texture to it.


I made my pull!

Tweak any changes you want to make whilst paint is wet maybe to reveal more of the writing beneath

I then added a decoupaged endangered Green Cheek Parrot on tissue and added the lettering via the computer as I was not sure if I want to make this permanent or not.  Remember you are in control!


Here is a slideshow of the others prints created from this session.  Some are finished and some are not and will be saved for a future occasion.  Click on the first image to activate slideshow


Please feel free to leave a comment and ask any questions you may have.
I hope that you enjoyed this blog entry and not its time to visit the others.  Just click on the links below and it should take you to where you need to go.


Till next time

Bixxy x


Gel Press
Kristi,
Teresa,
Keri,
Sandee
Cindi,
Cyndi,
Lea
Bix(you are here),
Kathy,
Ann,
Elena


Wednesday, April 13, 2016

Simple Landscape Video


As promised I have released a short video of how I do my landscapes under the Gel Press umbrella.

As you will see the steps are simple and easy to follow and you can make yours your own by introducing different colours, textures and subjects into your work.

I have shown the materials used and the outcome of each print.

Click HERE for video


Please feel free to comment or ask a question if you want


The final results of 4 pulls with embellishments

Click Here In the meantime France is sunny and getting warmer and together with the April showers we are also blessed with stunning views like this.


Holiday bookings are picking up once more after the terror strikes and there still a few places left on a couple of our Guest Tutor workshops.  Email us here at France Painting Holiday  for more info or visit the website

Also if you are interested in a printing workshop or a craft week also please inquire.  These workshops cannot takeplace unless we know that enough people are interested. 

Preparing now for the World Earthday bloghop on the 20th so visit this page again then with a chance to win a prize.

A bientot
Bixxy x
https://onedrive.live.com/redir?resid=4BE1A8D896E2CC3D!286&authkey=!ACoJkgvPjb8nLXU&ithint=folder%2cjpg

Monday, March 7, 2016

First Gel Press Post


Hi everyone,

just announcing first post on the Gel Press Blog showing some of my sketches done on Gel Press prints via a short video I did on Youtube

Hope you enjoy what you see.

Please feel free to leave me a comment below.

Bx

Sunday, March 6, 2016

HAPPY MOTHERS DAY!


A beautiful March day!

Inspired by the sunshine and the spring flowers poking their heads up went into the kitchen where the stove is burning, for a quick play with some Brusho (studio is a bit chilly at the moment) .


Of course finishing both these pieces from lines of William Wordsworth's "I Wandered Lonely as a Cloud" seemed appropriate.

I love the spring and the knowledge that the dark grey days are almost at an end I can go out more to sketch.


Sunny today with a touch of frost and perfect for a brisk fresh walk around the lake with Arty, before a lovely Beef roast dinner from our local farmer.....

He gets so excited when he sees us both get our wellies on and knows that its "round the lake time".


Of course he is dead to the world now this afternoon!

Thats it for now!

See you soon with some Gel Press updates!
Bix x

Thursday, February 25, 2016

Bixxy Nash - Creative Designer

Today I can officially announce that I am to be part of a team for an American based company called Gel Press as a Creative Designer amongst others with the same role. The great thing is that we all use similar tools but we produce very different work.  So this really is art that YOU create and will always be unique.

Its all exciting! 


So my Gel plate printing in the last couple of years has paid off and I hope now to move forward with the craft and develop many more techniques and already my head is swimming with inspiration and ideas. 

This is the facebook page for Gel Press Junkies so pop over there every so often to see what has been created by the team and other members. 


Recent work


So join me on my journey and please feel free to comment at anytime and I will endeavour to answer your questions.

These past few weeks has seen me busy with a miriad of things including the building of a new website and updating some old footage of videos etc.

Qatar
I also joined a group on Facebook called Everyday in February which is a sketching group.  


Peru
A new years resolution of "i must do more sketching in more creative ways" has resulted in my getting the above job on the team, by giving me the confidence to "go for it".  

This has been great for me as I also used gel printed papers that were in my "what do i do with these" box and sketched over them.  The theme this month was world travel and we given a different country per day to visit.  Here are some of mine on the Printed papers.
I selected each sheet based on the coloring of the scene that I had in mind or maybe just the national colours of the country from their flag.  I then worked round that. 
Sweden

  I used Micron tip pens to do the drawing and Tombow pens (brush felt tip style pens) for alot of the bright bits and watercolour in the lighter areas where the paint could take.


Oman
Of course you really could go mad and do collage and decoupage ontop using stamps of the countries and other souvenirs and memorabilia.


This is definately something I will be doing for my travel journals and will update you on these when I start.

So will all this going on....the holiday bookings are still coming in and I am looking forward to this season.

If anyone is interested in a Gel Press workshop please mail me on info@francepaintingholiday and I can give you some more information

I will end it here and be back in a few days with more.....

Abientot
Bix x


Tuesday, May 20, 2014

The Season has started.....

We have already had guests this May and this is how the schedule looks for the rest of 2014.  We are fully booked for Stephie Butler and Joanne Boon Thomas's workshops and for Keikos first week in July also.  We still have places for those shown below, but spaces are limited.
We are also taking bookings from artists that want to tutor and from groups too for 2015.  Please contact us here to enquire or make a booking

Although summer seems to be struggling to come to the fore we have had some lovely weather and quite dynamic weather too. 
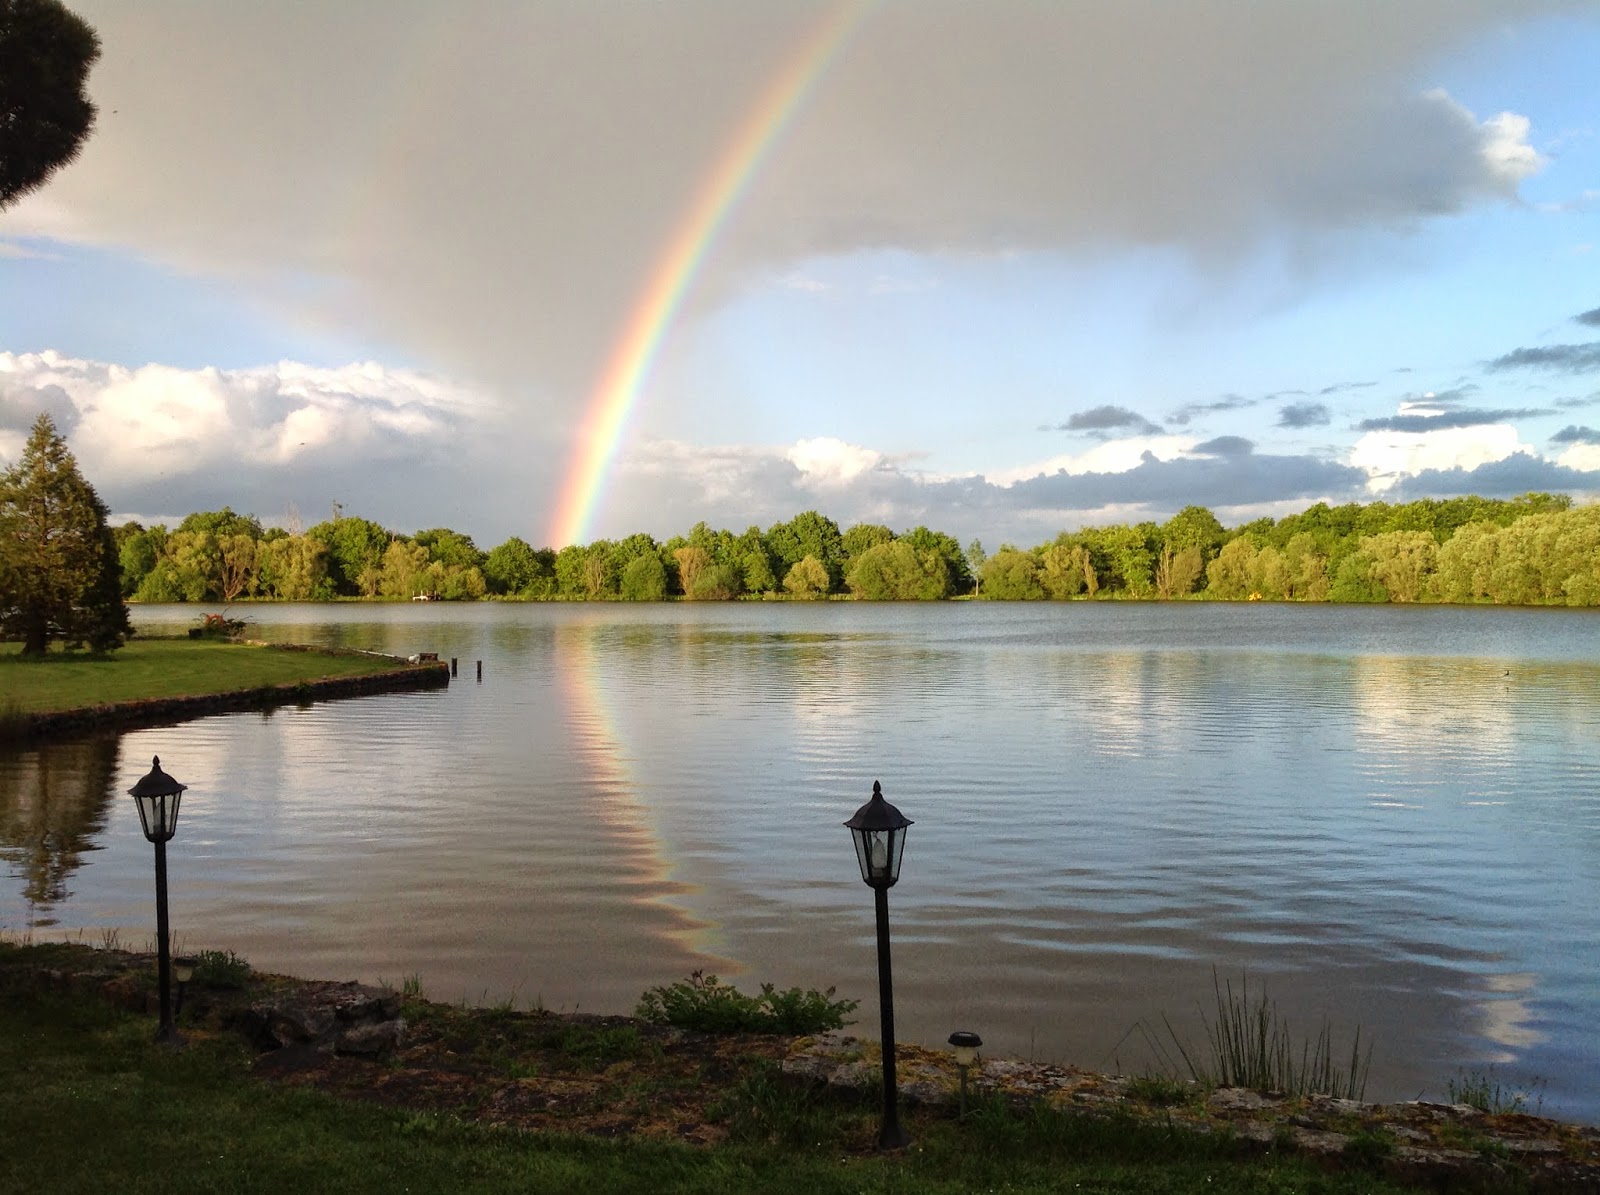
Always an amazing sight from our terrace. Rainbows in abundance and 
 even managed to capture a lightening storm too.  I love and good storm and this one did not disappoint either.


All the flowers are having a ball, even though most are out too early but its lovely and colourful.

The ducks (4 of them) Chippy, Coco, Madge and Spot are all thriving nicely and two are laying and we are hoping that Chippy has done his bit, being the token male.  But we got in some guaranteed fertilised eggs, just incase the girls are disappointed in their 6 week gestation period and none hatch. Drew is such a good mommy!  Need to read earlier posts to catch up with that one.  So our lucky guests coming after the end of June will be able to watch the wonderful antics of baby ducklings, if Mr. Pike doesn't get to them first. Which sadly is a fact of life here!

KITCHEN
Been experimenting in the kitchen too and have discovered to make Greek yoghurt and cottage cheese. Sooooo easy and all the recipes found on Pinterest, my latest love.......  to see what boards I have created click here and browse, or take...what ever! Welcome to the wonderful world of sharing!  Bixxysbox

Also just made 2 litres of Elderflower cordial, ready to drink with some fizz for the summer.  Gorgeous!

Menus have been studied and tweaked for the coming season and rememb er that if you have any food allergies or dietary requirements these are all catered for too!

ART
Admittedly my creative flow started slowly this year due to my hip replacement recovery.  Which incidently has been a breeze and all is good there. But now having started the season, the juices are flowing and my little head is ticking over with millions of ideas and projects and techniques too.  Although watercolour is my first love I am also in love with Gelli Plate printing.   For those not aufait with this term, read previous blogpost!

To update those that are following, DO NOT LEAVE YOUR GELLI PLATE IN THE SUN - IT MELTS!  Try and keep your plate cool at all times, and now that winter is over, in the Fridge is best.  If you can!  I came into the studio the other day to find that one of mine, in direct sun, had started to travel across the Perspex sheet that it sits on.  BUT......no problem. Back in the microwave to melt down and place into the mould.  Be creative and check out the supermarket for interesting shapes and textures to use for moulds and different looks.  Even when one splits the effects can be great using the 2 halves.

Here are some example of what I have done in the last few days.  Bear in mind that some of these need further work and embellishment!  Which is the fun bit!
Great fun  - as you can see here and relatively easy to achieve..  

Just takes imagination and lots of paper.  Please feel free to leave comments and ask questions at any time!

Clares
Mine
With respect to other artwork that I have done recently, I bought Glyn Maceys Acrylics Unleased and was truly inspired and decided to have a play with one of my guests last week and boy did we have fun.  Although mine did not turn out as indicated (because I got carried away) I wasn't unhappy for my rare play with acrylics and we both like what we did.

And generally have been dabbling with watercolour techniques and getting the exercises ready for our next set of guests.

So lots of fun and looking forward to the rest of the season which is going to be very busy.

Blogs only really work if people comment, so please feel free to do so and I will answer whatever questions you have.

Shorters posts in future!!!!!  Have fun!

Bx