Monday, August 13, 2018

Different Pastures


FOR SALE


No we havent moved yet.  

Nor is Bandouille properly on the market. Yet....Not until we can found someone who is actually capable of marketing and selling our beautiful home.  Finding an estate agent here that is worthy of their commission is proving extremely hard.  I say no more.

As most are aware we are currently not running art holidays as we wish to sell.  And I am relieved that this year we did not do them.  What with the atrocious start to the year with the rain and constant storms till the beginning of June and since then the incredible heatwave.  France has also been hit with air and rail strikes which has hindered tourism.  And indeed would have left us with alot of frustrated people, not to mention how awful we would have felt to.

So what to do?  Gardening is out...pretty much since having both my hips replaced, but mainly due to the fact the gardens gone mad and its too hot. Cooking exotic meals is not really practical for one....I am sewing and crafting and sketching, but need to be fulfilled.  I miss my guests terribly......


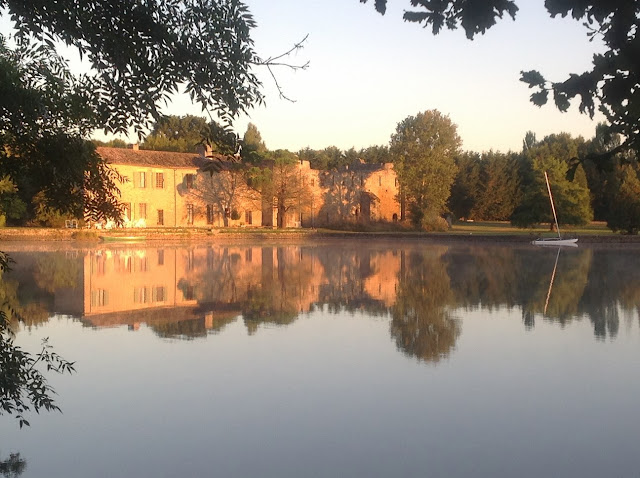
A couple of months ago my son Toby and his girlfriend Angelina surprised us with a visit from New Zealand.  Toby also arrived with his drone and has made a stunning film of Bandouille both inside and out.  So I spent some quality time with all three of my children in Brighon and then here at Bandouille and also in La Rochelle.  . It was the first time I had visited La Rochelle properly as a tourist and we had alot of fun cycling around the town, which was so easy as it was so flat and we also spent a couple of days exploring Ile de Re. Not enough time though and I will be going back there again soon, with sketchbook in hand.  It amazed me how close to the airport it was and how huge and wonderful the bridge was.  The beaches are gorgeous and the small white towns a joy to wonder through.
Gare de La Rochelle
Since then I have spent alot of quiet days sketching from the myriad of pictures that I had taken.

Faye L'abbesse
But truth is I am also re evaluating me...and what I want to do in the future.  I know now that I still want to teach and paint and to create and to be with people.

Then the blood moon eclipse happened and was aware that big changes could be taking place, not only for me but for everyone.  That day I received an email  asking if I knew anyone that could fill the place of an artist/tutor that had fallen ill and could not attend a venue near Bordeaux at short notice...Instantly I knew that it should be me to fill that slot.  I'd not really thought of "being the tutor" outside of Bandouille before.  But it made so much sense and I jumped at the opportunity.  I love coincidences and they certainly didnt stop there.

Chez Castillon
So I wrote back and offered myself et voila.....I'm off to the gorgeous Chez Castillon in a couple of weeks, to join my hosts Janie and Mickey Wilson and  a house full of authors which looks like lots of fun.  

Janie herself has just launched her latest book and its rapidly becoming a bestseller.  I have just myself bought it and am hooked as it touches on my life in many more ways than just one.  You can find it here.

I found a photo of their gorgeous venue and decided to get to know the place by sketching it on brown paper with gouache.   Being  in a "townscape" is going to be new to me in France and fits in perfectly with my recent new pastime of urban sketching.

I've not in the years of being here spent enough time travelling around France and now I am going to take the opportunity


Since then I have been revisiting my lesson plans and gathering my tools together and have also been making some sketchbooks and a brush roll too.  Such fun and I hope to share those ideas with my students too. 


Brush roll


The sketchbooks are made with watercolour paper and are made in accordian style  which is fun when out and about and creating a flowing record of your visit. It can be covered with anything you want including maybe maps of where you are going and inside you can attach an envelope to collect tickets and souvenirs that you pick up en route.  I also use my Gel prints


Accordian Sketchbook - watercolour paper
So I have alot planned and in the meantime the weather has become cooler and I feel some gardening coming on and also some eco printing too whilst the leaves and the flowers are still fresh.

In a few weeks I will be sketching with Christian Couteau which I am also looking forward to so will fill you in on that adventure too.

Watch this space 

A bientot
Bix  

Oh here is a picture of Arty too to show that he is still alive and kicking ....or not as the case may be  Bx


Thursday, April 5, 2018

Easter Over?

Well that seems to have passed my by......

So much printing done I didn't really notice Easter even happening...but my Easter Tree has to be done every year....even just to bring a little colour and cheer....I think the duck liked it!!! and amazingly enough my cat avoided
 This is the card that I made this year.  I always try and aim to make a specific card...but as usual only decided to at the 11th hour. Each time it seems its using a new medium and I chose this one to work on and add Chine Colle Easter Eggs.  The front eggs is gold chocolate foil which worked great.
I rather love it....


So many prints ....many are complete but many will have a further life.  Got lots of ideas.

Watch this space

Bx

Wednesday, April 4, 2018

Pushing the snowdrops

Following on from last week on this post I will be showing how I used the Gelpress plate with lino to produce more prints in a different way and also how to use water soluble crayons too.

I like to push an idea and take it further and this is not exception.

I line up my materials:-
Mangle, Gelpress plate, Lino block, acrylic paints, water soluble crayons and oil pastels, baby wipes, paper and water spray

Now Im ready to go.....


Watch the VIDEO here


FIrst the Gelpress plate.


I chose my colours.  Dark and light blue and a green and rolled out a thin layer and pressed the lino block into the wet paint


Apply even pressure to ensure that all the surfaces have taken the paint


I then put the block onto the press (converted from an old mangle - see previous post with video) and placed the paper over the top and covered with card and cloth and ran it through the press.  You can of course hand burnish the prints or use a wooden spoon too


The prints always come out nice and crisp and depending on where you place your colours always very unique and interesting.


I repeat the process.


I also use pre printed mono prints to print on creating another very different look.  In this case very soft and romantic.


This way the lino block will almost have a never ending life (Be aware though that Lino does have a life and will eventually crumble)


Watch the VIDEO here


You can of course pull many prints off the gel plate directly having pressed the lino block into the paint.  This gives yet another look that can be worked on later.


Next I use water soluble crayons and water-soluble oil pastels (yes a weird concept but they do exist).  These I love as they are so easy to use and they blend well together too


Water soluble pencils both the regular kind or Inktense are another alternative and the results are more permanent as the Inktense are ink based.  All these work beautifully  and create yet another look


I rub the colours that I want onto the block, in this case taking care of choosing colours to match the subject.


I then lightly spritz with water and lay the block on the press.  The water loosens the pigment which then transfers to the paper.  You can also play with spraying the paper with water.  Cover with paper and card and cloth and card again and roll through the mangle.


I result is more subtle than the acrylic but effective none the less and this can be altered depending on the amount of pigment you put on the block.  The paper can also be a major factor in changing the look of the print.


Practice and push the  limits and see what you can come up with.


This little one I printed directly into a sketch book...works perfectly and can be enhanced later if I want to.                                                                          
                                                                                                    Watch the VIDEO here

I haven't finished with the lino block yet...so watch this space for the last part

Bix x

See previous post for Lino Snowdrops Part 1 including another full video


Thursday, March 29, 2018

Spring Snowdrops - Lino Print (using Brusho)

Black on Colour
2nd Cut


Snowdrops - Lino prints
I am an experimentalist (not even sure that's a real word - but I like it). 

I like to play and push theories as far as they can take me and maybe further. 


So as a newbie with Lino here is what I recently did.....

Once I discovered the joys of printing, first via a Gel Plate and then doing collagraph work I was hooked (see previous entries) and desperate for some kind of "affordable" printing press.  So I started my search.

Valentines day last year my search ended at Ebay and found this baby for £15.00.  I still wasn't sure if it would work, but I was determined to try.


In this project I am Lino printing using my mangle as a printing press. 

 I have prepared it by rolling in a large MDF drawing board and made a registration jig using two corners of an A4 mount which has carefully been measured around the lino block aperture.

  Here you can see that that aperture is larger than the block I will be using as I have squared it off.  This did not really cause me any problems as I fitted it each time to the top left corner.  Double sided tape can be used to keep the block in place

The mangle set up with the registration board
I taped down the jig and set my rollers to the pressure that I need for lino printing.  This would be set tighter if I were to collagraph (or intaglio) print.

I have two A4 board pieces taken from the back of old sketch pads and a large chammois style cloth folded in half.

I later replaced one of the A4 pieces for a much larger piece to cover the whole area.

I rolled out a few practice runs till I was happy with the pressure.  This is important so that you do not ruin any potential prints.

Another theory I wanted to test was the use of Brusho powder in tinting block printing ink for printing from Lino.  I have searched everywhere for reference to this and found nothing.  So I thought I would see if it works.  The same goes for the Brusho thickener......I needed to find another use for it.  So I played.......


I printed all the backgrounds using these colours

My materials for this project

Ist cut - leaving the white
My Lino block
Black and White Block printing ink (waterbased)
Brusho in Blue and Yellow
Acrylic Paints
Brusho thickener to help with consistency
Brayers or rollers
Tile to roll out colour 
Different papers and card.

I began by planning my design and then cutting out the areas I wanted to keep white.

I then wanted to print some pretty backgrounds using light blues and greens.  This is achieved by putting down some of the white block printing ink on a plate and sprinkling in some Ost Blue Brusho powder and added some of the Brusho thickener that was now in gel form. As the white ink was waterbased this was possible. DO NOT TRY WITH OIL BASED INK.

I worked the mix till I got the right colours and consistency.

Here are examples of how they turned out.  The thinner the mix the more Iiked it.

I love the gentle texture the Brusho gives on these prints.  


2nd cut
Ink loosened with Brusho
I did my 2nd cut on my block. 

 This area will show the how much of the background I want and the first printing of stems and leaves.

  The ink is very very thick so I added some Brusho gel to loosen (not water)
  I worked the ink till it was tacky and sounded like velcro.

 I decided to do a black run first.

Just Black on White
Black on colour


These turned out to be very effective.

I like both looks.


I then rolled out a brighter green first with brusho
and later with acrylic paints 
(which I have found to work very well) 
and did my 2nd cut green print over the backgrounds


Different looks are achieved by using different greens and different rollers too.

The softer the roller the denser the print.  I made my own soft roller using a childs sponge roller and replace the sponge with a cork covered in foam sheet stuck with a glue gun....

Worked perfectly......


I also printed the green over previously pre printed monoprints for a very different subtle look


The last stage was doing the 3rd cut which will show some of the lighter green as highlights etc with a darker edge. 

This time I used a combination of blue and green acrylics.


A final print on textured paper
I like using acrylics for various reasons, but one is that it's permanent and therefore if I want to embellish these later the colour won't run. I could use oil based inks but I don't have those and they take longer to dry.


I am still very new to this method and many of the prints were not perfect for various reasons.  But I have learnt so much during the process which will enable me to achieve a better quality batch next time.

Although the block I am left with doesn’t have much left on it it still has enough to give an impression of a group of snowdrops and I can play more with this idea later.


Watch this space.

VIDEO I have made a video showing the processes and the results.  Click on the link here

Thank you for joining me here and if you have any comments please do not hesitate to ask in the comments below.

See you soon

Bix x

NB: Brusho products from Colourcraft Ltd , Blocking printing ink from Seawhites of Brighton